Pages

Showing posts with label Dress. Show all posts

Sunday, March 25, 2018

Darling Josephine


I have to be honest- I tend to stick to tried and true silhouettes when I sew. When I am sewing for myself it's because I think I have a pretty good idea of what is flattering on my shape, and when I am sewing for the girls it's because I stick to what I know (i.e fitted, short bodices and full skirts). 


I know it's a little lazy of me- and truth be told, I get lazy when I sew sometimes, and that's ok. Sewing is something I do, not only as a creative outlet, but also as way of coping with stress (and when you are stressed, lazy is ok).

However, trying new things is good and exciting and fresh, so when I was given the opportunity to sew up a new to me pattern from Bella Sunshine Designs, I was super excited.  


Just an F.Y.I, this pattern was provided to me for free in exchange for marking images, and this post does contain affiliate links (I'm hoping to support my fabric problem....) But, my thoughts are my own. 


I started testing patterns for Melissa at Bella Sunshine Designs what feels like forever ago, and off the bat I know when I pick up one of her patterns it will be well drafted, true to size, I will learn at least one new sewing technique, and it will be expertly written. The Josephine Dress and Top is no exception to any of this.  The pattern comes in sizes 6 months to 12 years, and features layers and a print shop option. 


First lets talk about the style. The fitted drop waist bodice is something I have never made for my girls - and you do need to be very mindful to get the perfect fit- remember all kids are shaped differently. Melissa made this easy- just make sure you take fresh measurements, check out the sizing chart, and follow her very detailed instructions to blend sizes. 


Adeline's Josephine is a size 12 month in the chest and in length, but graded out to a 2T in the waist/hip.   


Speaking of length, the Josephine comes in three different lengths: Top, Vintage, and Dress. I went for the Vintage length because I can't get enough of Adeline's baby legs- but keep in mind it is short. 


You can only see them when she is moving around- but I made her a matching pair of ruffled bloomers to go with the dress. 


The pattern features a boat-neck (remember to listen when the pattern says to stay-stitch!) cute, tiny cap sleeves (I love the way these are sewn in), and princess seams that are great opportunity for piping- or using coordinating fabrics! 
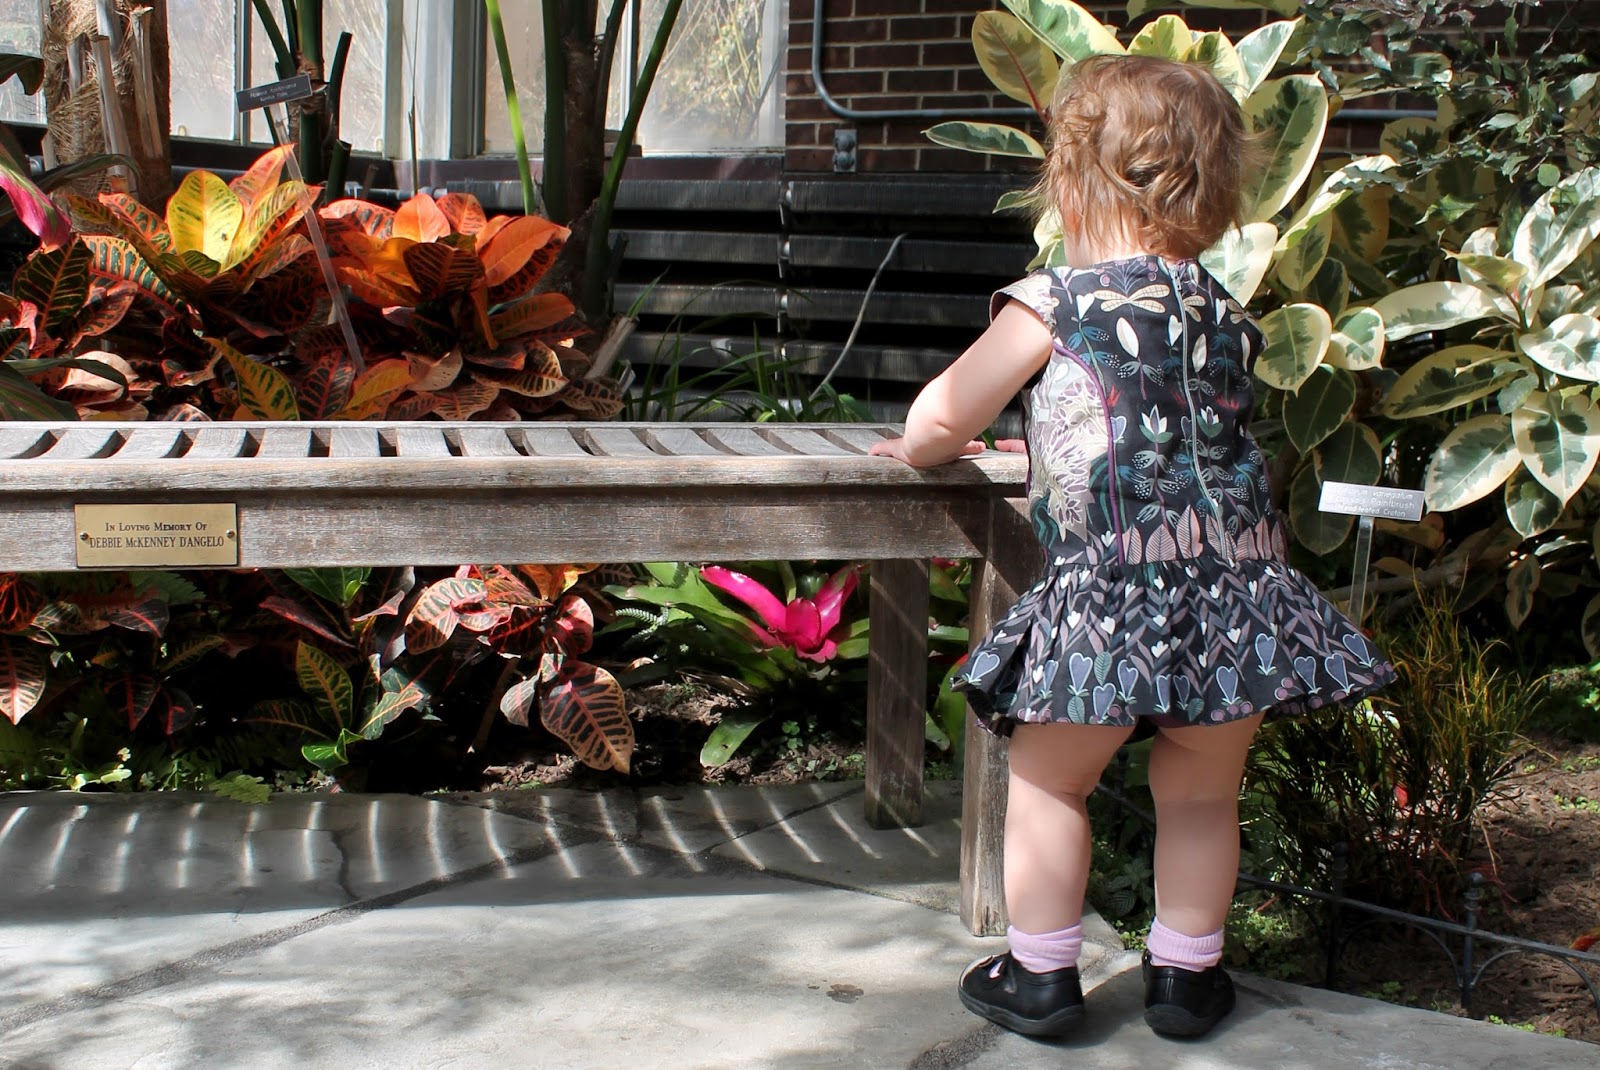

I just love piping so I couldn't resist that option. The pattern also opts for an exposed zipper- which adds just a touch of funk to the look.


One last thing- today (3/25/2018) you can pick up the pattern for only $5.00! Just head on over to the website and use the code "sunshine sale". Make sure you also join the BSD facebook page so you can keep tabs on future sales. 

Tuesday, September 19, 2017

A once in a lifetime event


One of the things that used to frustrate me about blogging was the delay- It seemed that all of these wonderful mommy bloggers had their posts up the day something happened! However, I think I have come to terms with the fact that as long as my pictures and stories make it to the blog eventually, I'm ok with it. This blog post I actually almost had finished and my computer restarted and deleted it! So to start again- This picture above, is not a cool filter, it is, in fact, the humidity of the south. 


As you might have heard, the United States had the opportunity to witness a once in a lifetime event- a total solar eclipse, with the path of totality stretching from Lincoln Beach, Oregon to Charleston, South Carolina. Originally I figured we wouldn't make a big deal out of it we thought about it because my best friend lives a long the path of totality, but I honestly couldn't fathom what witnessing an eclipse would be like (having never seen one before) and I didn't see much of a reason to spend hours in the car driving to a spot in the path of totality to see something I couldn't fathom. 


Except, as I was sitting through my Uncle's Funeral, one of his friends said something that resonated with me. He said "go see your friends, spend time with people, because often times a lifetime isn't as long as you think". Hearing that changed my mind in an instant, and I walked out of there planning car activities for the girls and making a grocery list of enough car snacks to keep us fed in case the drive took us four times as long as it should have. 


It was a very, very long car ride, but we made it, and I was so happy to visit with my best friend, and to give our girls the opportunity to play together. Through a series of events, some sad, and some lucky, we have gotten to see each other an incredible about of time this year despite living with several states between us.   


On Eclipse day we sat out in the drizzle with our fancy special glasses and were able to watch in awe as the moon started to cover the sun, but we were slightly disappointed to loose totality to clouds. 

That disappointment didn't overshadow just how cool it was to watch the world go dark as night in the middle of the day, and to hear the night bugs come out, and watch the birds fly home, or how much fun it was to be with friends. 


Although it did make this little girl a tad cranky. 


I'm hoping Cordelia remembers this trip, but I figured at least the girls will be able to look at these pictures and be told about the one time they were driven ten hours to sit in the front yard of Mama's best friend's house wearing coordinating outfits! 


It was fun to make a mini eclipse collection, much more fun than making them all the same dress I think. I used some beautiful Rae Ritchie moon phases fabric that I have been hording in my stash, along with a blue and grey galaxy print fabric, and a silver polka dot print from Joanns. The white trim on the little girl's outfits is vintage, and Cordelia's is ball fringe- it made me think of moons!  


I am grateful that this sweet family could host us! 


And I am grateful that my wiggly bunch survived the car trip! 


Sunday, July 23, 2017

Purple Tiger Dress with Nursing Hack


It's been awhile since I've written a nice, non dramatic sewing post! This dress is one I actually made back in March for my Grandmother's 90th birthday party, but it has gotten a ton of wear since then! 


I love breastfeeding but I also love dresses, and if you have breastfed before- or been around anyone who has breastfed, you know that your entire wardrobe becomes about how to get to your boobs. Unfortunately, this cuts out a lot of the dresses in my wardrobe and dresses are just so easy- you don't have to worry about your layers moving, or if they match right, dresses can be accessorized "up" or "down", and I always just feel more put together in a dress. 


Granted you can always wear shirt dresses (which I do) and there are a couple companies that make some super cute nursing friendly dresses, but plus size nursing dresses can be few and far apart (and expensive) and honestly- I really enjoy making my own clothing, so I decided to make my own breastfeeding friendly dress- out of some amazing Tula Pink  crouching tiger fabric. 


I started with one of my go to patterns- New Look 6723, I've made about five dresses from this pattern, all with different modifications so I knew how the dress would fit and it's a pattern I'm comfortable messing around with, but honestly you could modify any similar pattern.  


I decided to try out a snap down style (using Kam Snaps) , with a modesty panel. This isn't a tutorial, and my explanation of how I made this isn't fantastic-  but I hope the pictures help you if you want to give this a try. 


To achieve this I cut the regular back pieces in the fabric and the lining, and for the front of the dress I split the front bodice into two pieces - the main bodice and the strap. 


Then I cut a full length bodice out of the main fabric and the lining fabric and two short bodices- (for the modesty panel) out of a stretchy fabric. My short bodices come to empire length on me, I figured they would sit nice and flat this way- and it does but in hindsight I wish I used a thinner knit fabric. 

 I sewed up the bodices the way the pattern instructed, and attached the main fabric straps to the modesty panel. When it came time to attach the front and back I sewed the modesty panel section to the back at the shoulders and then sewed all three layers at the side seam. This seam was a little bulky but after I serged it and trimmed it it was ok. I added the kam snaps to the straps and the main bodice. 


I also lowered the back just for fun, and added a patch pocket- because I really like to have a pocket. 


I hope this makes sense, and if you are trying it out and run into a spot of confusion shoot me an email (ktocknell (at) gmail (dot) com) and I'll try to talk you through it! 

Saturday, May 7, 2016

Vintage Grace Flutter Dress- Pattern Review


Pattern testing has given me the opportunity to get to know the style of some really great PDF pattern designers. One designer I can recommend without even knowing what pattern you are talking about it Melissa from Bella Sunshine Designs. Every pattern I have worked on from her has just been totally top notch- and I am a big fan of how thorough her testing process is.  


The Vintage Grace Flutter Dress is Melissa's latest pattern (and one I had the pleasure to test). This pattern is sized six months to girls size 12, and features a great flutter sleeve with optional lace trim. The bodice has a great wide, flat, simple, front which makes for a great place to feature some super special fabric, or you could decorate it with a heat transfer design or applique. I love that the bodice is also lined so all of the seems are inside and not left where they can be itchy- which would especially be a plus if you appliqued the front!   


This is my first version of the new Vintage Grace Flutter Dress- It is also from one of the early stages of the pattern, so keep in mind that two inches were added to the length of the dress on the final version. I made this dress using my favorite black and white stripe cotton, and super awesome blue octopus fabric from Cotton and Steel.  I have been really obsessed with all things black and white- a trend that Cordelia hates, but the blue in the Cotton and Steel fabric made my fabric choices  five year old approved. Instead of opting for lace on the flutter sleeve I used black bias tape on the edge to repeat the black and white theme. 


The dress went together quickly- probably about an hour and a half not counting the cut out time (I take FOREVER to cut things out). The instructions are very straightforward and great for any confidant beginner. I like that Melissa includes cutting instructions for the skirt so you don't have to print and tape the entire pattern - you can just print the bodice and sleeve and then measure and cut your pattern. She also includes helpful tips on blending sizes and adjusting for length- and her size lines are marked with the size on them which makes it easier if you have to print multiple sizes at once.   


The last dress feature I want to mention is the adorable button back. I love a good button back, and I have such a large stash of buttons! I love buttons because it is such a nice extra touch in a little girl's dress- and Melissa's instructions on the buttons and the skirt placket get an A+.  So now that I am done gushing (for now) I want to mention that the Vintage Grace Flutter dress is on sale until Thursday!  


Friday, February 14, 2014

Happy Valentine's Day


For the most part I really like holidays (well except for Christmas because it's stressful and expensive BUT that is for a different post). I love the silly hearts and arrows associated with Valentine's day and who doesn't love chocolate and flowers? So Valentines is pretty fun in my book. This year I got even more excited for Valentine's day, after I saw this heart and arrow themed fabric for 65% off (and I had a 20% off coupon. . .). So a dress had to be made. 


It's a super lightweight cotton fabric from Joann Fabric. The bodice was cut with New Look pattern 6723- except I rounded the neck and lowered the back. The skirt is true circle skirt- with a slight gather on top, and pockets. 


Brendon and I were going to have a date night tonight, but since we got massive amounts of snow I don't think it's going to happen. So last night I put my dress on, styled it the way I probably would have worn it today if we were going out and dragged the hubby into the snow to photograph it. I hope one day I get better pictures of the dress to show you more detail- however, I know me so I don't have high hopes! I do however, hope you are all having a wonderful Valentine's day! 

Thursday, June 13, 2013

Arrg Matey!

IMG_1710

This week has been pretty eventful. Monday we took a trip to visit my grandfather (pictures coming soon, I swear), Tuesday I was feeling drained and under the weather,  and Wednesday Miss C contracted a stomach bug and spent the day throwing up on me- but! Brendon stopped on the way home from work and picked me up a new phone! I'm super excited, and now you guys will get prettier "over the weekend" cell phone pictures- win win! Miss C is doing better- she still has a slight fever, but her stomach is much better. After a busy day at work, that was punctuated by panicking about the crazy weather that ended up missing us, Brendon and I sitting around not doing much- which is kind of great. However, I want to take a break from being lazy to share some photos of a fun dress I made Miss C. 

IMG_1680

IMG_1683

IMG_1695

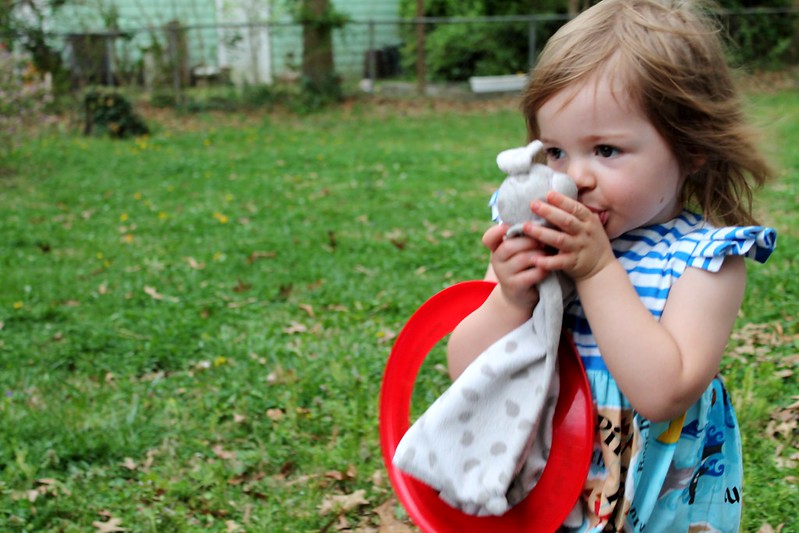
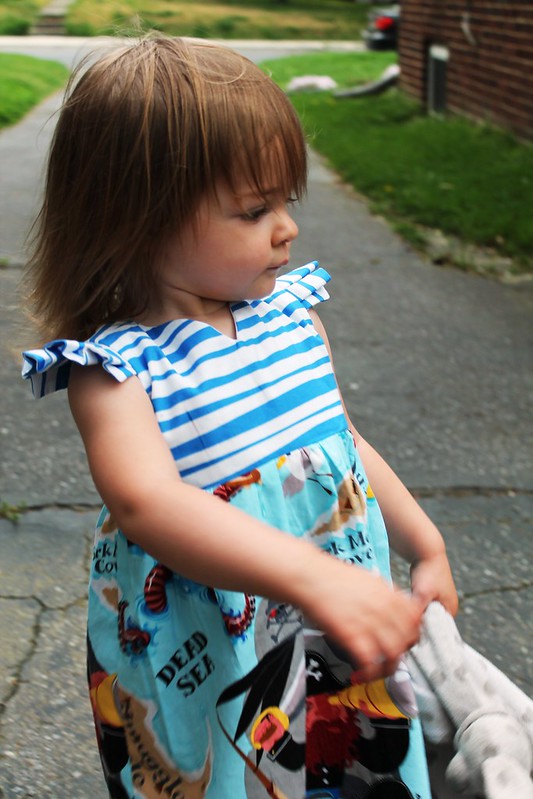
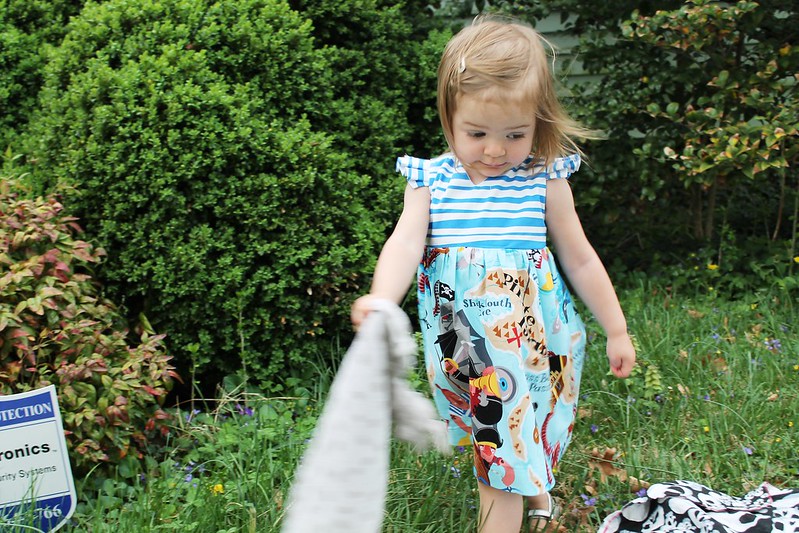
So, we have already talked about my love of using "boys only" prints and subject matters when making Miss C clothes (for example). When I ran across this fabric by Alexander Henry I flipped I was so excited! Who doesn't love pirates? This was especially perfect too because Miss C points to the Captain and exclaims "Daddy!". 

IMG_1700

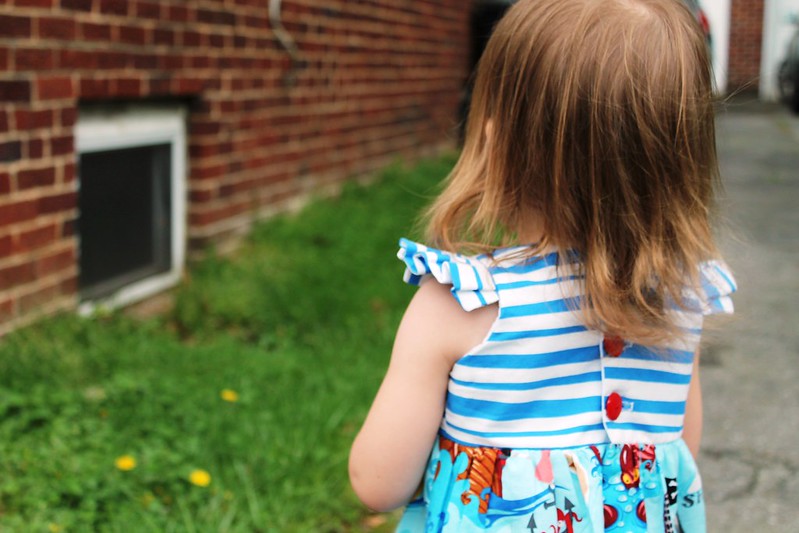
The bodice of the dress is a coordinating Alexander Henry print and features a notch neck, small pleated sleeves, and three neat red buttons on the back. I bought these buttons back in high school, and it took me until now to find the prefect project to use them on. The skirt is pretty simple- with just box pleats and an invisible hem. I really wanted to let the print speak for itself, and I think the dress turned out darling. 

IMG_1704

I'm going to go back to my lazy evening, I hope you are having a relaxing even as well!